
Sometimes we are all in that situation where we have done some remarkable stuff, but it’s all in a way only those brainiac coders can understand.
Running stuff from the terminal may not come in handy for a layperson. So to put together those great scripts into action, we may need the elixir of a GUI.
But for Python guys, there are limited options, and if you have searched for anything similar, you would have certainly come across the name PyQt.
What is PyQt?
PyQt is a Python library that enables developers to use the Qt application framework and GUI toolkit through Python bindings. PyQt allows for creating native-looking cross-platform desktop applications on various operating systems, such as Windows, macOS, and Linux. PyQt is built on the Qt toolkit, a widely-used and robust C++ framework for GUI application development. With PyQt, developers can take advantage of a vast selection of GUI widgets and tools for building desktop applications, which is made easy by its flexible and powerful capabilities.
PyQt was developed and maintained by Riverbank Computing, and its most recent stable version is PyQt6. From its release history, it seems that the release schedule of the major version of PyQt is coordinated with that of Qt.
Why did we need PyQt?
We have been closely working with the intention to develop a motor controller GUI to drive some serial motors through Arduino. Yes, we know GitHub has some packages with GUIs for the same, but we needed large-scale customizations and ended up with the choice to develop one.
Installing PyQt on Ubuntu
This should be pretty easy

is all it takes, and you are done. You can also get a detailed view of the procedures in the documentation and the licensing terms.
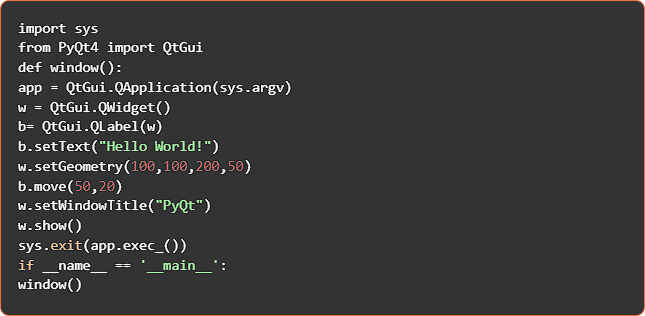
Creating a simple GUI application using PyQt involves the following steps:
– Import QtGui module.
– Create an application object.
– A QWidget object creates a top-level window. Add a QLabel object to it.
– Set the caption of the label as “hello world”.
– Define the size and position of the window using the setGeometry() method.
– Enter the application’s main loop by app.exec_() method.
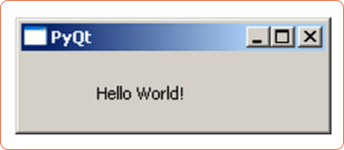
If your installation is all done well, this following python script should work properly
the above code produces the following output:
More about PyQt
A really easy method exists to create this GUI quite intuitively, but before that, we should discuss some basic concepts in PyQt. PyQt is a combination of nearly 20 modules and 400 classes. QWidget class, derived from QObject and QPaintDevice classes at the top of the class hierarchy, is the base class for all user interface objects. QDialog and QFrame classes are also derived from QWidget class. They have their own sub-class system. QWidgets are the building blocks of PyQt GUI applications. They are the graphical elements, such as buttons, labels, text boxes, and menus, that make up the user interface of an application. QWidgets are objects that inherit from the QWidget class and can be created and customized to create custom user interfaces. The QtGui module of PyQt provides a large collection of pre-built widgets that can be used to create various applications. Developers can also create their own custom widgets by subclassing existing ones or creating new ones from scratch. QWidgets are essential components of PyQt GUI applications and are used extensively in the development of desktop applications.
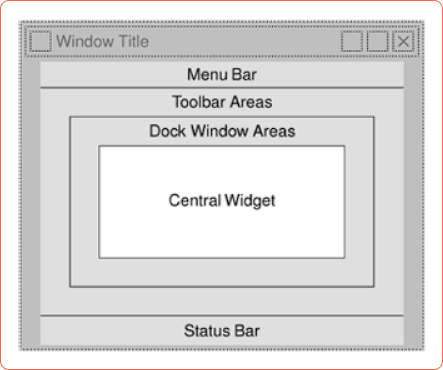
The QMainWindow widget object creates a typical GUI-based application’s top-level window.
Some widgets take their appointed place in this main window, while others are placed in the central widget area using various layout managers.
The following diagram shows the QMainWindow framework:
Read More : Next.js vs React: Which is the Best Front-end Platform for Your Project [Infographic]
Qt Designer
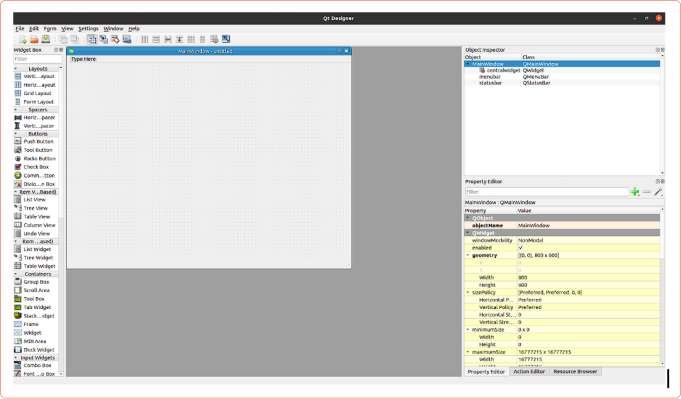
Now let us see what Qt Designer is in the previously said intuitive way. This is really going to make our tasks a lot smoother. Qt Designer is a graphical user interface (GUI) design tool that allows developers to create and design user interfaces for Qt-based applications. It is a WYSIWYG editor, which means that developers can drag and drop widgets and controls onto a form and visually design the user interface. Qt Designer generates XML files that define the layout and properties of the UI components, which can be used in Qt-based applications. Qt Designer is integrated with the Qt framework and can be used with other tools, such as Qt Creator, to create, edit, and preview Qt-based user interfaces. This comes pre-installed with the PyQt, which we have pip installed. So all you have to do is just type designer in the terminal and press enter.
Now let us explore a bit with an example. Once we open the Qt designer, this would be the interface.
In the search filter, the first and foremost widget I would suggest using in any project would be the “frame”.
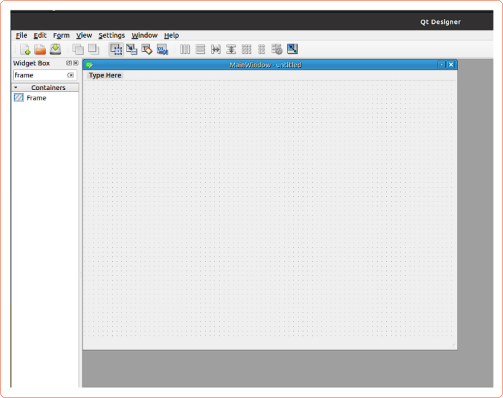
This is because later it would become handy and you would surely thank me later for this tip.
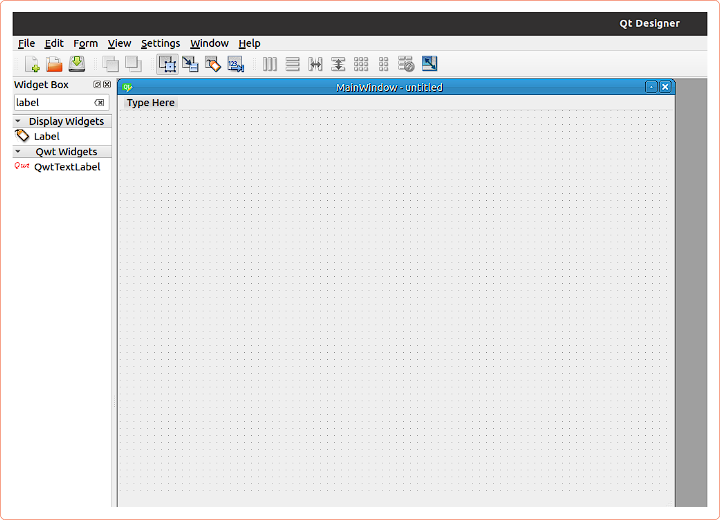
Next, at the same place, search for a label. Now drag this label to the frame.
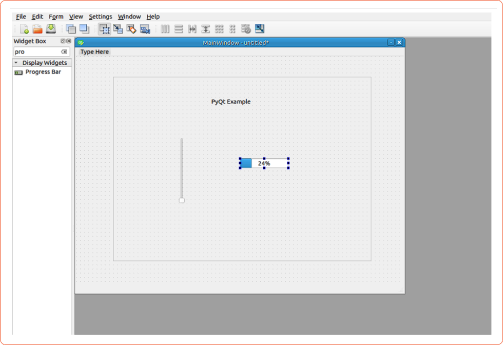
Similarly, for a simple example, drag the vertical slider and progress bar into the frame in the main window. Inside the label, you can write something, say, “PyQt Example”. So after doing all this, our mainwindow should look somewhat like this.
On the side, you can see object inspector and property editor by which you can change features of the widgets put into main window.
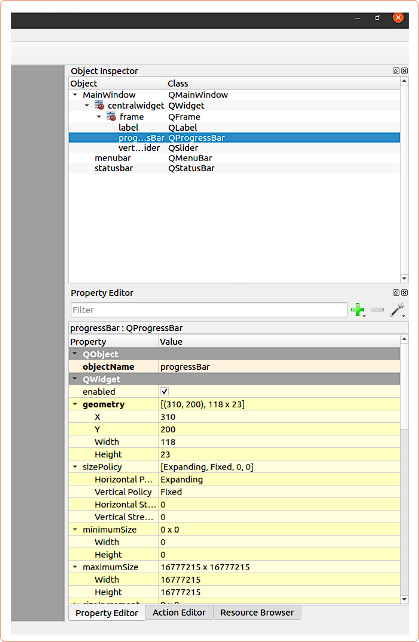
Exploring these features is beyond the scope of this blog.
So as we save any other file, we can save this file to a folder. This would be saved as a .ui file.
Yep! Now the question is how to add life to this ui. Say, for example, can we slide the vertical slider, and that value can be indicated in the progress bar? But still, there exists a problem; if we open our .ui file, it would be in XML format and creating linkages and applying logic in this format would be arduous. Hence our first task would be to convert this .ui file to a .py file so that we can really make the thing work. For this, you can take the help of a tool called pyuic5. If this is not installed in your system, you can do this by

from the terminal.
Now in the folder where you have saved the .ui file; now on, let us rename and call it “example.ui“; open the terminal and run the command

This should create a python file in the same folder, which is a python-based script of the ui we have developed in the Qt designer.
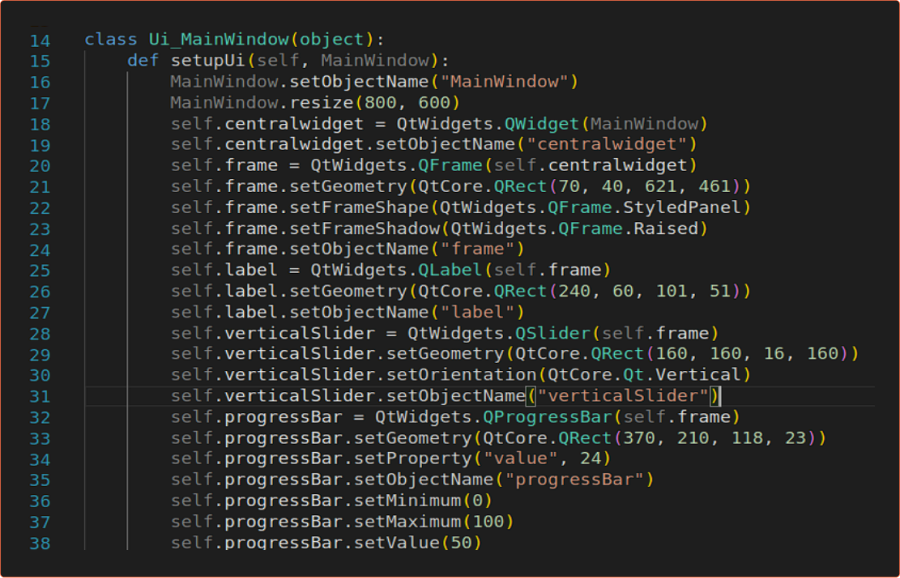
Now let us link our vertical slider with the progress bar. As you go through the example.py, you will find the details of the vertical slider widget. For example, in the image, I have opened the code in VS Code, and you can see about vertical slider in lines 28-31 (Note: line numbers are totally subject to my code editor, this may not be the case with you and need not panic in this regard).
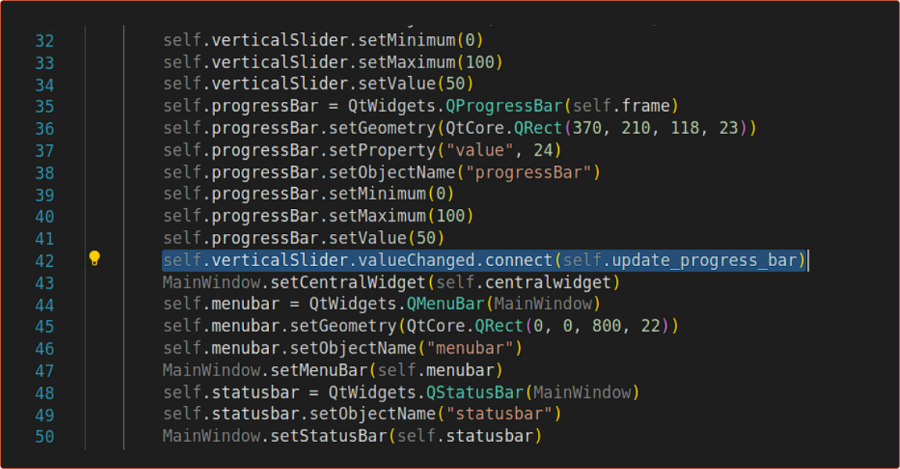
Now you can add the following code snippet beneath that,
i.e., now, 32-34 in the following image.
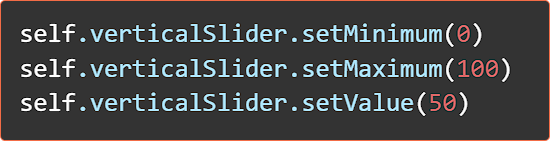

What this does is set the minimum, maximum and initial value of the slider. Similarly, find the part in the code that mentions the progress bar i.e, line 38.
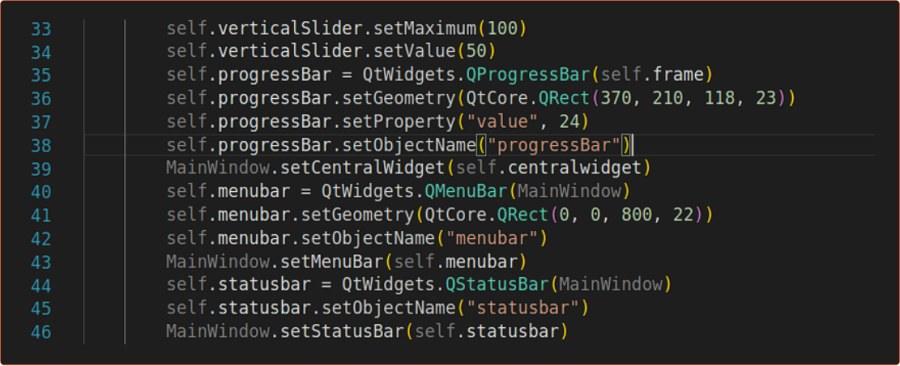
and add this code

so now it looks like,
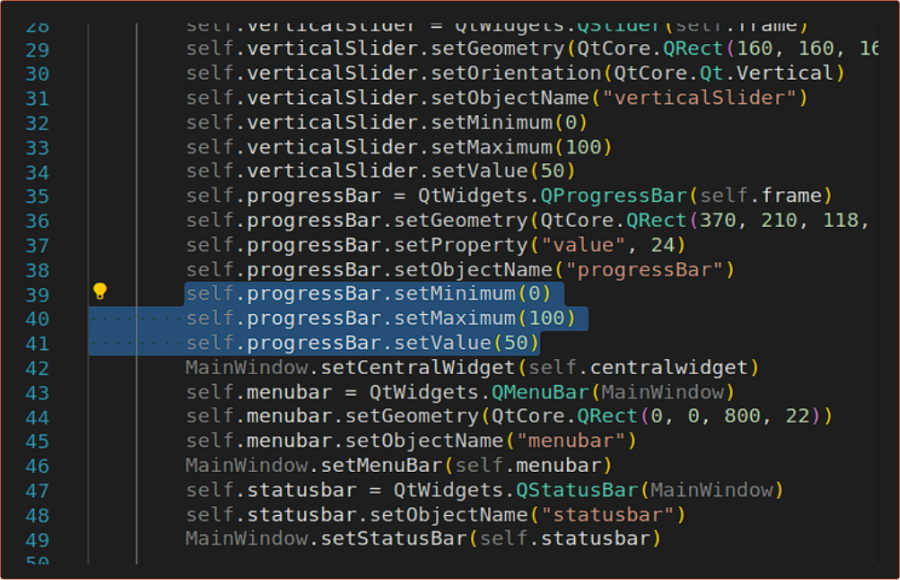
This does the same to the progress bar as we have done to the vertical slider.
Now comes the task, to link the vertical slider with the progress bar, we need an additional function(method as it comes within the class) which may be called when we move the vertical slider. So we will write the function call as such.

what this line of code does is connect to a function update_progress_bar within the class once the value of the vertical slider is changed.
Here except for update_progress_bar, all are built-in methods.
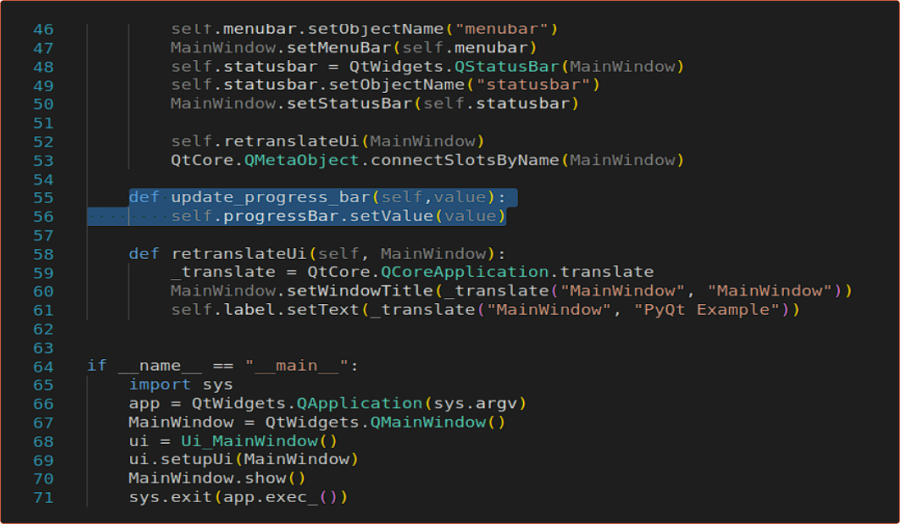
Now the content of the update_progress_bar function would be

Here the value in the function parameter is the vertical slider value, and the progress bar value is set to this value passed from the vertical slider.
That’s it; save this and run our example.py python file from the terminal as
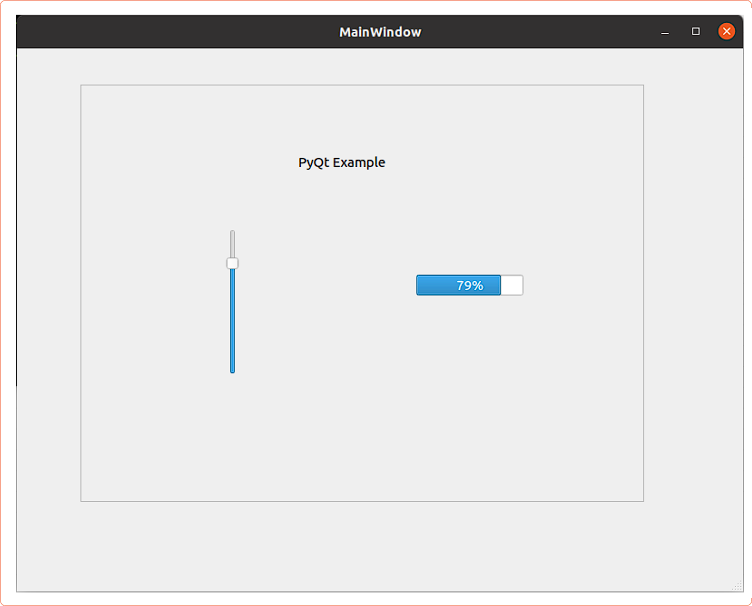
Now you will see the main window, the vertical slider and the progress bar. When you slide the vertical slider, you can see the progress bar moving with the corresponding value.
Kudos, that’s it. We have created our first PyQt App. No, that’s not the end. There is a lot more to go, but if you are a beginner and have come this far, you have done an amazing job. Happy learning…
Dig Deeper : Angular Vs. React Vs. Vue: Which Framework to Choose For Your Business?
Wrapping Up
In conclusion, PyQt is a powerful and popular Python binding for the Qt toolkit. It allows developers to create beautiful and functional desktop applications with ease. However, mastering PyQt can be a challenging task, especially for beginners.
That’s where neoito comes in. Our team of experienced Python developers can provide expert guidance and support to help you leverage the full potential of PyQt. From consulting and training to development and maintenance, we have the expertise and resources to ensure your PyQt project is a success.
So, if you’re looking to develop a high-quality desktop application with PyQt, don’t hesitate to reach out to us at neoito.
FAQs
PyQt is a set of Python bindings for the Qt toolkit, which is a comprehensive set of cross-platform application development tools. PyQt allows developers to create graphical user interfaces (GUIs) in Python using the Qt libraries, which provide a wide range of widgets, graphics, and layout tools.
What are the advantages of using PyQt for GUI development in Python?
PyQt offers a number of advantages for GUI development in Python, including its robustness and flexibility, the wide range of widgets and tools available in the Qt toolkit, and the ability to create cross-platform applications that can run on Windows, Mac, Linux, and other operating systems. PyQt also allows developers to take advantage of Qt’s powerful model/view architecture, which provides a powerful framework for managing complex data sets.
What are some best practices for using PyQt in Python development?
Some best practices for using PyQt in Python development include:
- Writing code that is modular and reusable, using classes and objects to encapsulate functionality.
- Using the Qt Designer tool to create user interfaces visually, and then integrating them with Python code using PyQt.
- Following a consistent naming convention for objects and functions to make code easier to read and understand.
- Using error handling techniques to catch and handle exceptions that may arise during development and testing.
How can I get started with PyQt?
To get started with PyQt, you will need to download and install the Qt toolkit, which is available for free on the Qt website. You will also need to install the PyQt package, which can be done using Python’s package manager (pip).
Once you have installed the necessary software, you can begin writing PyQt code using your favorite text editor or integrated development environment (IDE). There are also many resources available online, including tutorials, documentation, and forums, that can help you learn more about PyQt and GUI development in Python.